
Clearing the mistake of the photos that have been important or useful to us is a mistake that many of us may make. Sometimes some of these photos can be recovered, but in some cases it is not possible to recover photos at all. Try your chances and get to know 4 ways to recover deleted photos from the phone gallery.
Check the trash of the phone to recover deleted photos
When you mislead one of the most important photos inside your phone, the first thing you need to do is find and check your cellphone Recycle Bin. The photos you have mistakenly deleted may have been in this section. The location of the trash on different Android and iPhone phones is different and you have to find it depending on your mobile type.
Note: Note that the deleted photos remain in the trash for 5 days or less and then completely remove from your phone and cannot be recovered.
Use the DiskDigger application
Generally, the likelihood of recovering deleted photos from the main memory of the phone is very low. But if your phone is already rooted, then it may be possible for you to some extent. DiskDigger is one of the useful applications that can be used to search for deleted photos on the phones that have been rooted. But what about how to use this program?
1. In the first step, first install the DiskDiger app on your phone.
2. Give you the necessary access that DiskDiger wants you.
1. At this point you want to choose between Basic Scan and Full Scan options. You should click Full Scan.
1. Now you need to select and click on the internal memory of your phone, which is originally referred to as /Data, and select the type of file you want to recover.
1. Finally click OK to begin the recovery process. Note that this is time consuming.
1. At this point, Diskdigger tries to recover deleted images, but it may not be able to recover all files.
1. Now you need to select the files you want to recover and click on Recover to perform the recovery process for you.
1. At this point, simply select the storage of your photos. The best choice is to select the DCIM folder to get the photos into the camera folder.
1. Finally, press the OK button to save your photos in the folder.
Use the Droidkit application
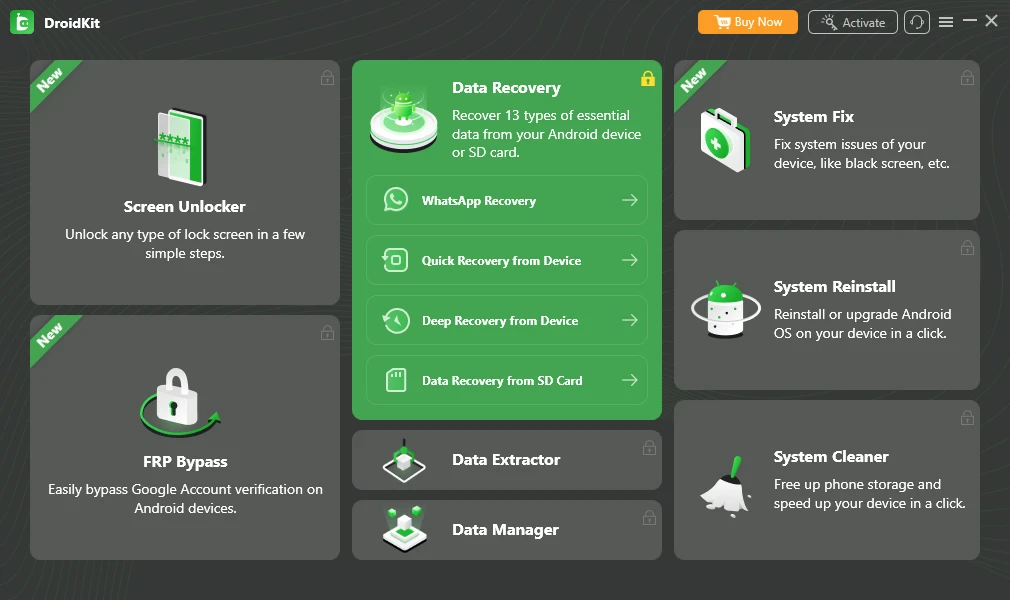
Another app that can restore the photos from the phone gallery is the Droidkit app. With this Windows app you can recover a number of your data without having to root your cellphone. To use this program you can easily install it and after connecting the mobile to the computer, click Recovery from Device and finally click Start to return the deleted files. This app is one of the best options for restoring deleted photos of the WhatsApp app and may not be very useful for retrieving gallery photos.
Recovery of deleted photos from the phone gallery on the SD memory card
If the photos in your gallery are stored on the SD memory card, you can use a number of methods to recover them. Keep in mind, however, that this is not guaranteed. The important thing is that after unwanted removal of photos you should not store new information on your SD memory card. In other words, be sure to recover as soon as you realize the unintended removal of the photos. Here are some ways to recover deleted photos from the phone gallery on the SD memory card:
Use Disk Drill’s application

Whenever you realize that you have removed the photos on your SD card, download the Disk Drill app in the fastest time and use it to recover photos. But what is the way to do this?
1. In the first step, download and install the Disk Drill program on your computer.
2. Now connect your SD memory card to your computer and enter the Disk Drill program.
1. Use this program to scan your memory card.
1. Then press the Preview button to select the images you want and recover them with the Recover button.
Use Easeus Data Recovery Wizard
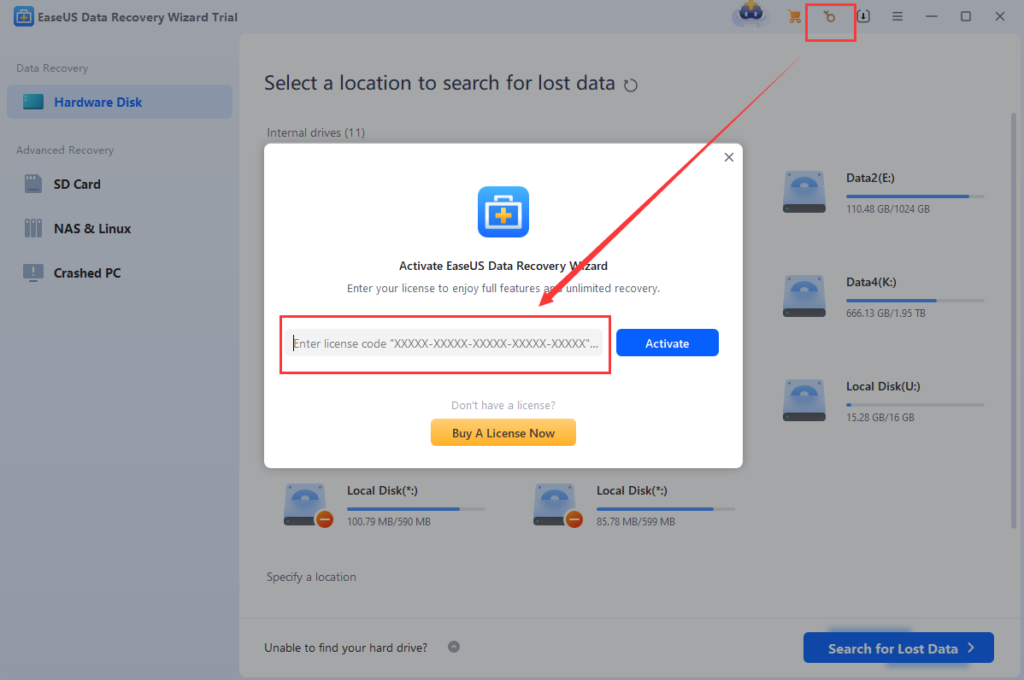
Another best app you can recover deleted photos from your SD memory card is Easeus Data Recovery Wizard. This program is designed for computers and in operating systems such as Windows and Mac. SD memory card recovery steps using Easeus Data Recovery Wizard:
1. Download Easeus Data Recovery Wizard first and install it on your computer.
2. Now connect the SD memory card to your computer.
1. Run the Easeus Data Recovery Wizard program.
1. After you open the app, you will be displayed all the drives you can recover. Just find and select your SD memory card at this point.
1. Then hit the scan button to get started. The data recovery process may take more than half an hour.
1. In the free version of Easeus Data Recovery Wizard, you can recover up to 1 GB of data you have mistakenly deleted.
1. At this point you should go to the left panel of the app and click Type. By doing this, hit the sliding button and select Graphics and finally JPG format.
1. See the images you can recover.
1. Finally, select the files or files you want.
1. In this step, click Recover Now and specify where you would like to save the recovered files.
Recovery of deleted photos using Google Photos
![]()
Google Photos is one of Google’s useful services that looks like your phone’s gallery and has a variety of features. For example, you can categorize or even edit your photos using Google Photos. On the other hand, the ability to back up your photos is another benefit that Google Photos gives you.
One of the ways to recover deleted photos from the phone gallery is to use the Google Photos service. To do this, simply open this app on your cellphone and then go to the trash section, which are named like Trash or Recycle Bin. In this section you can see that there are some of the images you missed. You can simply click Restore to recover the photos you want.
Note: Note that after removing the photos in Google Photos, it will only remain in the trash can for 7 days and will be erased forever.
Recovery of deleted photos from the phone gallery using Dropbox

Dropbox is another cloud service to store photos. If you upload your photos to Dropbox and later deleted them mistakenly, there is a way to recover it. Of course, this is not possible with the app and you should use the Dropbox Desktop version.
After you enter the Dropbox version of the desktop version you need to go for the path where your files were stored. Then specify the files you want to recover and finally restore them. Note that the deleted files will remain in the Dropbox trash section for 5 days and are then completely erased and cannot be recovered.
Recovery of deleted photos from the phone gallery using Microsoft OneDrive

If you have changed your phone’s settings that the Microsoft OneDrive service has been back up from photos, you can use the same service to recover photos you have mistakenly deleted. To do this, just do the following steps:
1. Log in to Microsoft OneDrive.
2. See the me section of this program.
1. Click on the trash option or the RecyCle Bin.
1. You can now select the files you want and click Restore to recover your files.
- Note: Note that the deleted files remain in the Microsoft OneDrive trash for 5 days and then erase forever.
- Note: If the size of the files you missed is more than 5 % of the total Microsoft OneDrive space, then your files will be deleted earlier than 5 days.
Recovery of deleted photos from the phone’s main memory
Many online services claim that they can also recover deleted photos from the phone’s main memory. There is no way to recover the photos from the phone’s main memory because the operating systems have strict protocols so that they can recover deleted photos to zero. So our suggestion is not to make sure such advertising. But there are a number of solutions that, although they are unlikely to retrieve photos, we suggest you try your luck anyway:
Run Disk Drill on Mac Operating System to Recover Removal Pictures from the phone’s main memory
If your photos are on the main memory of the phone and have mistakenly removed them, running the Disk Drill program on the Mac operating system can be helpful. Consider the following steps to do this:
1. In the first step, download and install the Disk Drill app for your Mac operating system.
2. Now connect your phone to your computer using a USB cable.
1. The USB Debugging needs to have the Disk Drill app access to your mobile device.
1. Now log in to the Disk Drill app and make sure your mobile device is selected.
1. Select the images you want to recover and click Recover to recover your photos.
Use the DR.Fone app in Windows to recover deleted photos from the phone’s main memory

If your operating system is not Mac and you want to recover deleted photos from your phone’s main memory, we have a solution for you. In this way, files are less likely to recover. The following is a recovery process:
1. In the first step, enter the DR.FONE site and download the Windows version of Dr.fone.
2. Now install and run this app, but don’t connect your phone to the computer.
1. Now select Data Recovery in the DR.Fone app.
1. At this point, connect your phone to your computer with a USB cable.
1. Here you need to select the photos you want to recover and finally click Next.
1. In this step, select the location of the photos.
1. Finally you have to wait for the scan of the program to be fully done. In the end, it is still necessary to click Recover to complete the recovery process.
Very important point about deleted photos recovery
One of the things about recovering photos that have been mistakenly deleted is to recover them as soon as possible and not waste time. In fact, as soon as you realize that you have mistaken your photos, you should no longer use your phone’s camera to take new photos or make changes to your phone’s memory in other ways, such as downloading photos or data transfer. But what is the reason for this? Because with the creation of new photos, new data will replace previous data, making it difficult to recover old photos.

For a limited period
Source Link